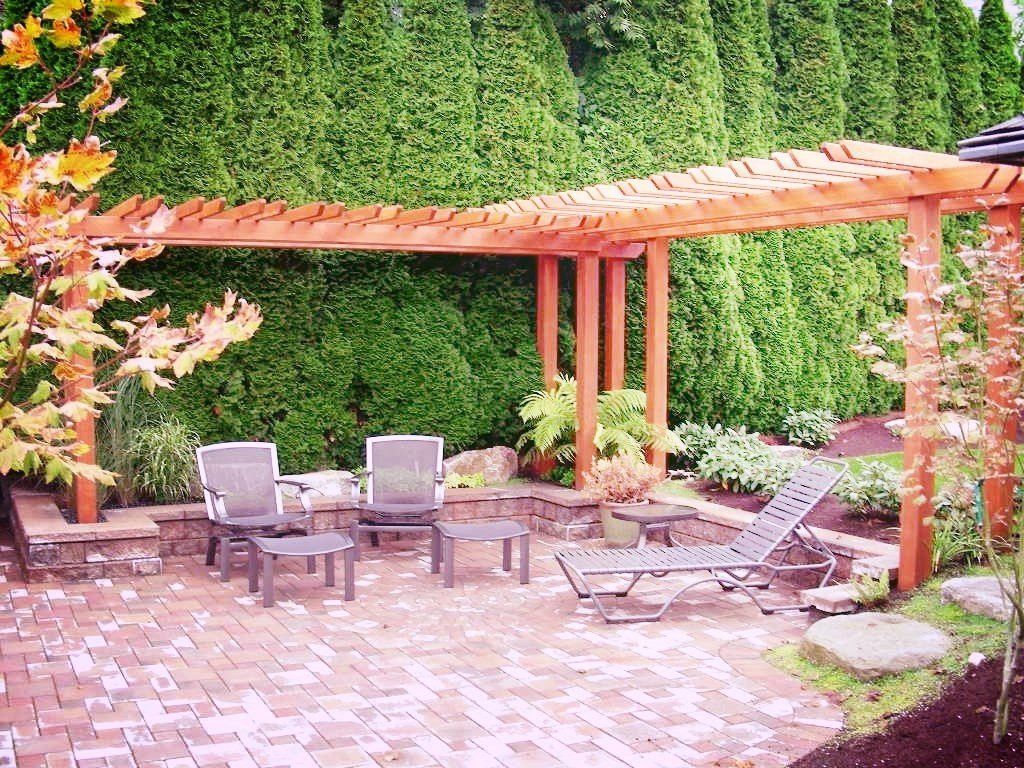
Outdoor living is seeing a bit of an explosion lately: Adding a deck is one of the most requested home projects today, and demand is steadily rising.
New durable outdoor materials, furniture and accessories plus unique shade options and smart tech that lets us watch movies and have full kitchens have no doubt fueled the interest. So if you’re hoping to make the most of good weather in your area, a new deck has likely crossed your mind. Here’s what you’ll need to know about finally getting one.
Why. To extend living space and enjoy the outdoors with an area for dining, grilling or lounging.
First thing to consider. You’ll want to decide whether your property is good for a deck or patio — or a combination of both.
Deck. A deck is a platform with decking boards or tiles, usually made of either wood or a composite material. A deck is ideal for sloped yards where you want a flat area. It’s also good for homes that sit high above the ground or atop a basement, because they can be built as high as you need. If your home sits higher than about 14 inches off the ground, a platform deck is probably for you.
Patio. A patio is on flat ground and is usually made of concrete, pavers, flagstone, wood or another hardscaping material. Doing a patio on a sloped lot is costlier and much more difficult, because retaining walls must be built to create a level surface. If your door opens right at the ground level, then a patio is the option for you.
Many people choose to build a deck that steps down to a patio.
What do you want your deck to do? Typically, people want a deck that’s multipurpose, with areas for eating, cooking and hanging out. But, as with most things, the sky is the limit. So depending on your budget, consider things like an outdoor TV, a fireplace, a fire pit, a hot tub, a kitchen, a water feature and more.
Figuring out what you want your deck to do will also help determine its size, safety measures and traffic flow. Do you host a lot of parties, or is it just you and a partner? Do you have a lot of kids? The last thing you want or need is a deck that’s too small or too large for your needs.
Also consider privacy on your deck. If you don’t want to feel like you’re on a stage performing for your neighbors, you’ll want to think about adding an arbor, a pergola, latticework or something else to create privacy.
How will you access the deck? If you currently have a door that leads outside to where you’ll want your deck, then congratulations — you’re in good shape. But if you’re adding a deck to a portion of your house that doesn’t have a door, then you’ll have to add an opening, which can increase costs drastically depending on whether you’re planning for a door in a load-bearing wall or not.
If you’re using your deck for dining (which you should), you’ll want it located as close to your kitchen as possible. “You don’t want to have to climb a bunch of stairs just to go back in for some salt,” says Clemens Jellema, who runs Fine Decks and has been building decks for 20 years.
Consider how it will look. When adding a deck, it’s best to consider the style and architecture of your house so that the addition either blends in with or at least complements your home. An experienced professional will be best suited to make recommendations on deck style, materials, color and more.
Know Your Material Options
The two main options for decks are wood and composite boards. Historically, wood has dominated decks, but lately composite boards are more in demand. Jellema says there was a time when many homeowner’s associations didn’t allow composite decks, because they looked too plasticky and had other problems. Now it’s the complete opposite. “Many developments don’t allow wood decks,” Jellema says. “People don’t take care of them, and they can start to look ugly in five or six years when they start to weather.”
Composite boards. Composite boards, seen here, are engineered products that are a mixture of wood fibers and plastic; a lot of the material comes from recycled plastic grocery bags. Some companies use old shredded carpets for wood fillers. Newer composite boards are wrapped in a thin plastic layer so they won’t stain or fade. These are more expensive than wood boards but often come with a warranty of 20 to 25 years, are low maintenance and can be made to look almost identical to any species of wood out there. Plus, they stay the same color as the day you installed them.
“A lot of contractors have had problems with composites in the past, but they’re getting pretty good now,” Jellema says. Composite is about 40 to 50 percent more expensive than real wood, but because you don’t have to keep restaining it and paying for upkeep, the cost over time can be equal to or less than real wood.
To clean composite decking, just rub some detergent on it and hose it off.
Wood. Many wood species are less expensive than composite but can weather over time and drive up maintenance costs. If you don’t take care of the wood, it can rot, dry out, warp, crack and splinter, and nails can pop out. But if you’re willing to maintain it, wood decking is beautiful, especially up close. Shown here is an ipe deck, which is a Brazilian hardwood known for its natural durability and for being weatherproof. Jellema says the price of ipe has risen dramatically in previous years due to demand. It’s now about the same price as composite.
If you go with a wood deck, it’s recommended that you power wash it and re-oil it after pollen and leaves have fallen, because they’re a food source for bacteria, Jellema says.
Keep in mind that the availability of certain woods varies across the country. Redwood and cedar are popular deck choices on the West Coast but are hard to come by on the East Coast. And, again, check with your HOA about any restrictions on using wood or composite decking.
Other Considerations
Shade. If it’s too sunny or raining, you won’t be enticed to use your new outdoor space unless you have some shade or some sort of covering. There are endless options here, from large umbrellas and retractable awnings to pavilions, gazebos and screened-in porches. Of course, the more elaborate, the more expensive it will be. You can have a deck porch with finished ceilings, fans, TVs, heating and A/C, fireplaces and more. “Projects can get so elaborate that it’s almost like building a house,” Jellema says.
If your deck will be raised 8 or 9 feet off the ground, consider converting the space below into a dry area for entertaining or storage. To do this your deck builder will integrate panels beneath the decking so that water falls through, gets collected and is sent to a downspout. That way you have a dry, shaded extra patio spot.
Lighting. A good lighting plan will greatly extend the time during which you can actually use your deck.
Consider ambient lighting for lounging, task lighting for things like cooking and grilling, and safety lighting for stairs and railings.
Cost. The cost for deck design, materials and labor varies by location. An average composite deck that’s between 300 and 500 square feet costs around $20,000 to $30,000 in the Washington, D.C. area, Jellema says. A smaller basic size, like one for a townhouse that’s 12 feet by 18 feet, might be $10,000 to $15,000 in the same area, he says. According to Houzz’s Real Cost Finder , an average deck costs about $14,000 in San Francisco; $6,848 in Austin, Texas; and $4,392 in Little Rock, Arkansas.
A deck with varying elevations, a hot tub and a porch or pavilion can cost $50,000 to $60,000. Jellema once built a $120,000 deck. “But that was before the recession,” he says.
But keep in mind that deck additions are solid investments. Jellema says a deck addition often recoups 70 to 80 percent of its value when a home is sold.
Whom to hire. A professional deck designer-builder is recommended for this project. A pro will meet with you, take measurements and photos of your site, and talk with you about your needs. He or she can make suggestions on blending the deck in with your existing home, and is knowledgeable about local building codes and obtaining the proper permits. “We set up decking with lasers to make sure it’s level; we use the right nails and the right screws,” Jellema says.
A professional will also map everything out in 3D software and look at traffic flow and placement of furniture, to gauge whether the deck is too big or too small. “You want people to get drawn to the deck and really come out and enjoy it in the evening or weekend,” Jellema says. “That’s when the design is a success.”
What’s more, if you’re doing a deck, try to find someone who specializes in decks. If it’s a patio you’re looking for, look for someone with patio experience, as different approaches are required for each.
If you’re adding an outdoor kitchen, you’ll need someone to do the plumbing and gas lines. If you’re adding an entertainment system or lighting, you’ll need an electrician as well.
DIY. Jellema says 65 percent of all decks are built by homeowners trying to save money, but he warns that these structures are often done without permits, and that can come back to bite homeowners when they go to sell. “You go to sell your house and have a home inspection, and in the end you’ll have to fix your deck that isn’t up to code before you can sell your home,” he says. While a deck can certainly be a DIY project if you’re confident enough in your building abilities, keep in mind that a lot goes into a deck to make it look right and stay level. Again, because deck additions can recoup around 80 percent of their cost when you go to sell your home, it’s often worth it to invest in a skilled professional.
Permitting and codes. If your deck is more than 200 square feet, you’ll likely need a permit. If your deck is more than 30 inches off the ground, you’ll need a permit. If you’re doing retaining walls that are higher than 3 feet, you’ll need a permit. Higher than 5 or 6 feet and you’ll need an engineer.
Plus, every county has different building codes for decks. Some places allow cable railings; others prohibit them. If you’ve got a septic tank or well on your property, that can affect where your deck can go. Deck builders will be able to read your site plan, assess where the setback is and if there’s a well or septic tank, and create the drawings to submit for a permit. “It can be hard for a homeowner to pull a permit, draw up the construction plan and build it right according to all the codes,” Jellema says. “It’s not worth it.”
When to do this project. When the weather is nice is obviously a good time to build a deck, but adding a deck is also a good opportunity to think about your backyard as a whole.
Many deck builders work with landscapers, pool companies and other outdoor professionals to create a full-package makeover.
How long it will it take? An average deck that’s between 300 and 500 square feet will take about one to two weeks to build. If you’re adding a porch, pavilion or gazebo, it will take at least another week. A simple townhouse deck without many corners that’s 100 to 300 square feet could take as little as three to four days. But it all depends on where you live. Some states, like earthquake-heavy California, may require that everything be done by a structural engineer for approval. Some places issue permits in a couple of hours; others can take up to two months. Other factors include whether you’re in a flood zone, whether you’ll need to cut down trees and whether you have a septic tank or well on your property. A good deck professional will be able to look at your site plan and determine these factors.

If you want to frame your own space, it’s worth considering dark fencing, as a black edge will give much more definition than a lighter shade.
When you’re picking your fence color, it’s important to consider the rest of the hardscape. Having many dark surfaces, for example, can create a cozy look, but it can also overwhelm a space.
This black fence clearly marks the seating area at the far end as a separate zone, with black raised beds along the length of the yard forming a subtle link between the front and the back.
The dark lines of this addition and pergola are replicated on the fence. By using the same shade, the designers created a harmonious connection between the house and the landscape.
The furniture is also black, which allows it to blend into the background, adding an extra layer of coziness to the space.
Tell us: Are you planning to paint your fence black, or have you already gone for it? Share you thoughts and photos in the Comments.
Here’s how to choose a spot for a nook and eight design moves to make it feel like your very own secret garden destination.
To create an intimate nook-like seating area, look for sites in the garden that feel secluded and somewhat enclosed. Alcoves created by hedges, walls and fences, or an area under a large shade tree, are good bets for placing a small seating area.
Swap out furniture as needed. For example, a small foldable cafe table used in spring and summer could be traded for a movable fire pit to anchor a seating nook in fall and winter.
Bamboo is a great choice for small gardens in need of quick cover. The plant grows faster than almost any other, and its skinny, upright form doesn’t take up too much floor space in a small area. To avoid bamboo spreading by underground runners — which will make you no friend of your neighbors — choose a clumping bamboo variety like ‘Golden Goddess’ ( Bambusa multiplex ‘Golden Goddess’).
The screening itself, whether you’re using fencing, walls or hedges, provides a perfect opportunity for nestling in a seating arrangement. Here, the designer used wood slat screens running laterally across the lot to selectively interfere with how far you can see and carve out multiple nooks for seating.
To enclose a garden seating area with greenery, leave room for planting a variety of perennials, shrubs and trees in beds around a patio or in large pots. Hanging a feeder or including pollinator-friendly plants like nectar-rich salvia or cape honeysuckle will help attract wild birds to your garden, if this is also one of your goals.
Another idea: Convert all or a section of an existing garden shed into an inviting nook by swapping out storage space for a cozy chair, blanket and side table.
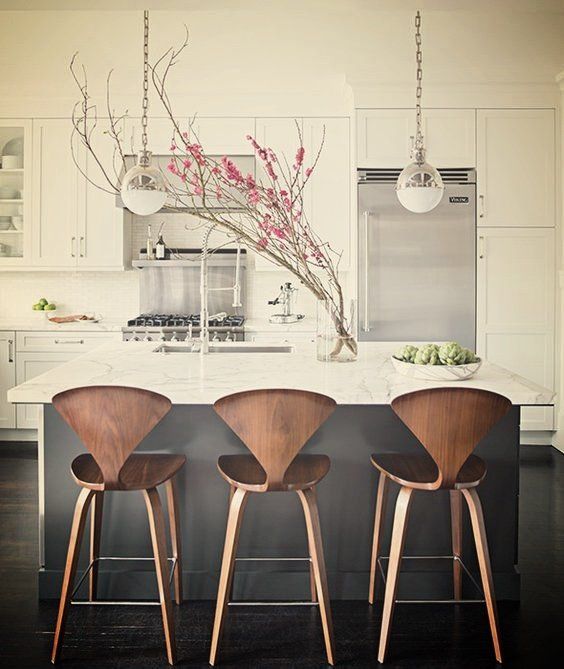
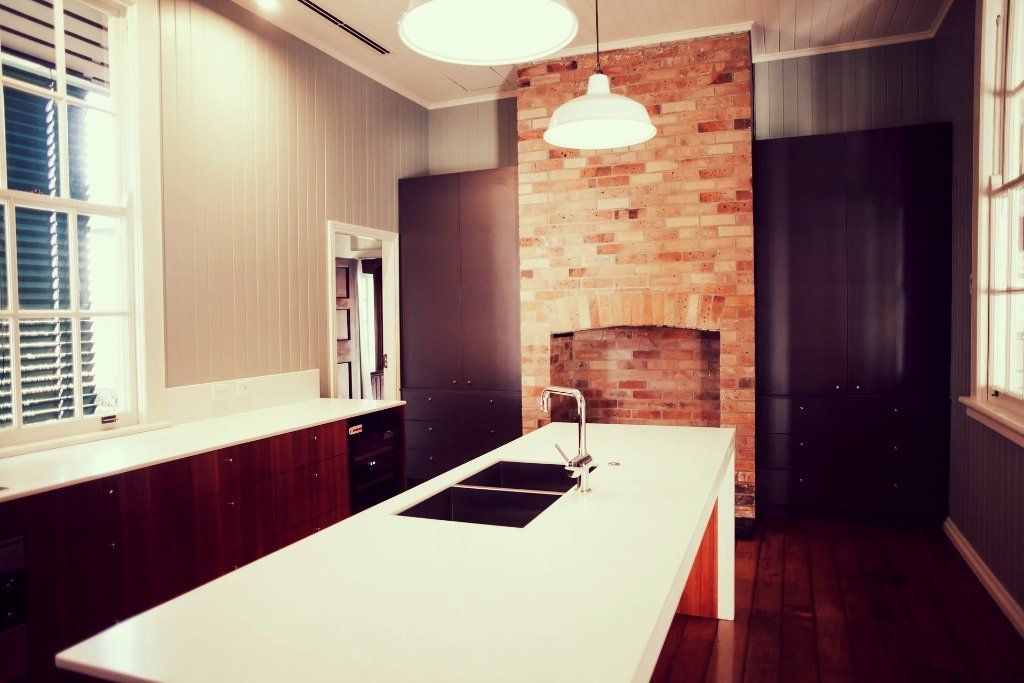
Kitchens and bathrooms have a cult following. You can spend $24,000 on a good cedar fence and no one will notice. But spend $24,000 on your kitchen or bath and everyone compliments you.
These areas are important for a reason. Kitchens are about sustenance, about socializing with family and friends. Bathrooms are about taking care of our bodies. Kitchens and baths matter.
Between the two, which one should you remodel first?
Or at all ?
Often, a sale is looming and you need to decide which will have the biggest impact on resale value. Or with an unexpected windfall or tax refund burning a hole in your pocket, you want to know where to send that money first. Incorporate these objective views into your decision-making process:
Which Is Cheaper?
Answer: Bathroom
On a national average*, minor mid-range kitchen remodels run about $19,000 and major remodels go for $57,000.
Using the same set of data, minor mid-range bathroom remodels cost about $17,000. Major bathroom additions--this means adding 48 sq. feet of all-new space--cost about $40,000.
Which Is Less Disruptive?
Answer: Kitchen, barely
This is a close call, since eating and bathing (plus all those other unmentionable bathroom-related activities) are equally important.
But if you had to do without one of these rooms for one month, you could live without the kitchen.
You do have alternatives, such as restaurants, fast-food, delivery, or a microwave and hot plate.
But when the bathroom is gone, there are no options. Even if the work contract called for a portable toilet--not likely in a mid-range kitchen or bath remodel--you would still need to find a way to bathe.
Which Is Faster?
Answer: Bathroom
At a minimum, count on about 18 days for a mid-range bathroom remodel. For kitchens, This Old House 's Tom Silva estimates that the "best case scenario" is one month, with a more realistic time frame being 2 to 6 months.
Which To Do For Resale?
Answer: Kitchen
Kitchen is the "heart of the home" and it is also the heart of the home sale.
It is no mistake that, after the exterior, the next picture on real estate websites is of the kitchen. In addition, the kitchen is usually where the Realtor sets up camp during open houses. This means that the kitchen becomes the locus, the visual focal point, for buyers.
According to Consumer Reports , 52% of real estate professionals consider the kitchen the most important room to influence a house sale versus 42% who consider the bathroom to be the most important room.
When choosing a paint color for any room in your house, you should think of the wall as the blank canvas of a painting. "Any artist will tell you that the background color sets everything else up," says Gretchen Schauffler, founder of the paint line Devine Color. "It sets up the temperature, the depth, the mood, and the atmosphere for all the other colors to be layered and featured."
In other words, choosing the right wall color will make or break your room, and given the thousands of paints on the market, it can be a daunting task. We asked two color experts, Schauffler and Puji Sherer, to help simplify the decision-making process.
An artist by trade, Schauffler started her paint line in 1998 out of her Portland garage, and Devine Color’s 136 hues are now manufactured and distributed by Valspar. Sherer is the President and Chief Color Nerd at Colorhouse Paint , a line of 128 shades crafted for interiors from a non-toxic formula. They offered tips for selecting a personal color palette, as well as some of their favorite schemes.
1. Consider light and scaleSherer says it’s important to remember that not all colors look good on a larger plane. "Something that’s different about architectural color, is that you have to consider scale," she says.
To do this, pick a color with undertones—Sherer describes them as "the colors that are not necessarily primary when you’re looking at the color"—that are compatible with the room’s natural light exposure. A room that faces north will have much different quality of light than a south-facing room, and each affect the color differently.
Say you’re eyeing a dusky lavender, but when you scale it up to four walls, its blue undertones take over. Now, in your north-facing room, that once warm lavender looks lilac.
To avoid results like this, review potential shades in the space, by painting a swath on a big poster board or section of the wall. "When you’re choosing color from a small paint chip, it’s hard to recognize the undertones," says Sherer.
Pro palette: A true white
Just want white? Check out Imagine .01 , Colorhouse’s top-selling hue. It’s a bright, untinted white, so no pesky undertones to decipher, and it works well on walls, trim, and ceilings. "From a design perspective, white is really, really popular," Sherer says.
2. Connect the colors
"It’s not so much about the right color," says Schauffler. "It’s about the colors that are going to connect everything and make everything look beautiful together." Schauffler begins her color consultations by evaluating the existing space first. She assesses the color of the flooring and wood tones, as well as the furnishings, fabrics, and accessories that are staying put.
"I will walk into somebody’s home and diagnose the colors that are there already," she says. "Somebody may not consider the fact that their kitchen is 70 percent orange already, because they have orange floors, orange cabinets, and orange wood in their dining room set. So if they want to paint the walls yellow, it’ll feel like they’re drowning in a pint of ale."
Pro palette: Gray walls + black trim + white ceiling
Schauffler’s living room is painted in Devine Buffalo , a grey. "It’s the perfect neutral to bring out all of the color in my art," she says. Her ceiling is a crisp white, Devine Icing , while other woodwork, like window mullions, baseboards, and doors are black ( Devine Leather ).
3. Let the wall color be the background
For living spaces, both Sherer and Schauffler recommend letting the wall color be a supporting player to the rest of the scheme, in order to let brighter colors come forward and draw the eye. "I’m always explaining how that background color is going to actually allow you to see the foreground," says Schauffler.
Sherer realized this when it came time to decide colors for her own house. "Being a color nerd, I was like, how do I jam pack as many colors into this space as possible without it feeling like a crayon box?" she says.
In her living room, she ended up selecting neutral walls ( Nourish .03 ) that were somewhat "muted and subdued." "The colors sit back, so they become more backdrops and don’t overwhelm the space," she says.
Pro palette: Green walls + White trim and ceiling
"Another great color that can act as a neutral, especially in living room spaces, is anything in the green family," says Sherer, pointing to Colorhouse’s Leaf and Glass families. These include Leaf .02 , a warm khaki green, Leaf .03 , a soft silver sage color, and Glass .02 , a "green on the edge of blue," all paired with white trim and ceilings.
4. Choose accent colors thoughtfully
Accent colors that are applied to the trim, woodwork, and ceiling have a big impact. They can make architectural features stand out in contrast, or recede. The contrast can also deliver different aesthetic effects. For instance, pairing a denim wall color with white trim looks very traditional, as opposed to pairing that same denim shade with light green-grey trim, for a whimsical effect.
Shauffler uses the example of a diluted aqua, called Devine Reef. Paired with the light pink Devine Poodle , it makes for a sweet little girl’s room. Combined with a charcoal or chocolate color, like Devine Cocoa , it gains sophistication.
Accent colors also anchor a bright and saturated wall color. Sherer points to Almost Ripe , Colorhouse’s 2017 color, which is a "yellow-green bordering on fluorescent." "We’re pairing it with pastels and a really grounding green that’s almost black," she says. This palette shows how colors can "talk to each other and influence each other," as the accent colors work to balance the brighter main.
Lastly, don’t forget the ceiling. "Oftentimes the ceiling is a neglected surface in interiors," Sherer says. Even just opting for a warmer shade of white can make a difference. Sherer suggests Bisque .02 , a white with a few drops of umber.
Pro palette: Charcoal walls + black trim + white ceiling
Schauffler painted her bedroom Devine Penguin , a deep charcoal. Then she paired it with Devine Leather , a "black-black," on the window trim; "To frame the windows so that I can see the lake without having a white frame stop my eye," she says.
5. Check the temperature
A color’s temperature affects your experience of them. For restful retreats, go with cooler hues, like blues and greens, which promote calm and peacefulness. "Any colors that are a little bit on the cooler side are great for bedroom spaces," Sherer says. Warm and energetic colors, such as yellows, reds, and oranges, are great for social spaces. They are "gathering colors, so they’re good to put in spaces like dining rooms or kitchens, where people sit around the table and share stories, or cook and eat together," Sherer says.
Pro palette: Blue walls + white trim and ceiling
In her bedroom, Sherer has Water .02 , a complex blue with green and grey undertones, that pairs well with white trim ( Air .02 ) and ceiling ( Air .01 ).
Pro palette: Burnt orange walls + warm white trim + light beige ceiling
A great kitchen color scheme is Clay .02 , a burnt orange, paired with Bisque .02 trim, a warm white, and finished with Bisque .03 , light beige, on the ceiling.